
 Guards + Retainers
 Custom Night Guard
 Retainer
 Emergency Order

 Whitening
 Whitening Kit
 Teeth Whitening Gel
 Dual-Action Foam
 Cleaning + Care
 Ultrasonic Cleaner Pro
 Water Flosser
 UV Toothbrush Sanitizer
 Deep Clean + Freshening Tablets
 Accessories
 Guard Removal Tool
 Replacement Nozzles
 Bundles

A water flosser can be one of the best upgrades you make to your oral care routine, but only if you actually know how to use a water flosser correctly. Too many people blast water at their teeth at full pressure on day one, soak their bathroom mirror, and give up before the first week is over. Sound familiar?
The truth is, proper technique matters more than the device itself. Aiming at the right angle along the gumline, choosing the right pressure setting, and working in a consistent pattern are what separate a genuinely effective clean from an expensive way to splash water on your face.
At Remi, we designed our Cordless Water Flosser to make interdental cleaning as straightforward as possible, but the tool only works as well as your technique. This guide walks you through exactly how to use a water flosser step by step, from filling the reservoir to targeting every tooth, so you can get a thorough clean without the mess.
What a water flosser does and when to ask a dentist
A water flosser sends a steady, pressurized stream of water between your teeth and along the gumline to flush out food particles, plaque, and bacteria your toothbrush cannot reach. Unlike string floss, which relies on direct scraping contact between teeth, a water flosser uses hydraulic pressure and pulsation to clean gaps, pockets, and crevices without threading anything through tight spaces.
How a water flosser actually cleans
The device works by directing a pulsating water jet into the spaces your brush leaves untouched. That pulsation is what sets it apart: consistent water flossing reduces gum inflammation and plaque buildup more effectively than brushing alone. The stream dislodges debris from between teeth and below the gumline in a way bristles physically cannot replicate.
Learning how to use a water flosser correctly starts with recognizing that the stream complements brushing rather than replacing it. Brushing breaks up surface plaque, and the water flosser clears out what remains in tighter spots. Used together, they create a significantly more thorough daily oral hygiene routine than either one produces alone.
The pulsating action of a water flosser can reach up to 6 mm below the gumline, deeper than standard string floss reliably goes.
When to check with your dentist first
Most people can start water flossing without professional guidance. Certain conditions, though, call for a quick conversation before you begin. If you have active gum disease, recent oral surgery, or deep periodontal pockets, your dentist may recommend a lower pressure setting or a specialized tip to avoid irritating sensitive tissue. People with temporary crowns, loose fillings, or recent implants should confirm that pressurized water will not interfere with their dental work.
- Recent tooth extractions or implant placements
- Active periodontal treatment in progress
- Temporary crowns, bridges, or cement-bonded restorations
- Known sensitivity around specific teeth or gum tissue
Step 1. Set up and choose when to water floss
Knowing how to use a water flosser correctly starts with proper setup. Take two minutes to fill the reservoir and select the right tip before you begin. Getting this right means fewer interruptions mid-session and a cleaner result from the first pass.
Fill the reservoir and select the right tip
Fill the reservoir with lukewarm water, not cold. Cold water can trigger sensitivity, especially if you have exposed roots or thin enamel. Secure the reservoir firmly onto the handle before powering on, or you will get leaks before you even begin. Remi's Cordless Water Flosser comes with multiple tips, so pick the standard jet tip for everyday use and swap to a specialized tip for braces or implants.
- Standard jet tip: general cleaning between teeth and along the gumline
- Orthodontic tip: designed to clean around brackets and wires
- Periodontal tip: reaches deeper pockets for gum-sensitive users
Choose the right moment in your routine
Use your water flosser before brushing, not after. Flushing debris out first lets your toothbrush and toothpaste work on a cleaner surface. For most people, once daily is enough, ideally at night before bed when plaque accumulation from the day is highest.
Flossing before brushing lets fluoride from your toothpaste reach areas the water flosser just cleared, maximizing protection.
Step 2. No-mess stance, lip seal, and pressure control
The biggest reason people abandon water flossers is the mess. Knowing how to use a water flosser correctly means controlling where the water goes before you turn it on, not after. Two simple habits solve most of the problem: your body position and how you close your lips around the tip.
Lean over the sink and seal your lips
Stand directly over the sink with your chin tilted slightly down. Place the tip in your mouth before you power on the device. Seal your lips loosely around the tip so water flows out into the sink rather than spraying across the mirror. You do not need a tight bite; a gentle lip closure is enough to redirect the stream downward.
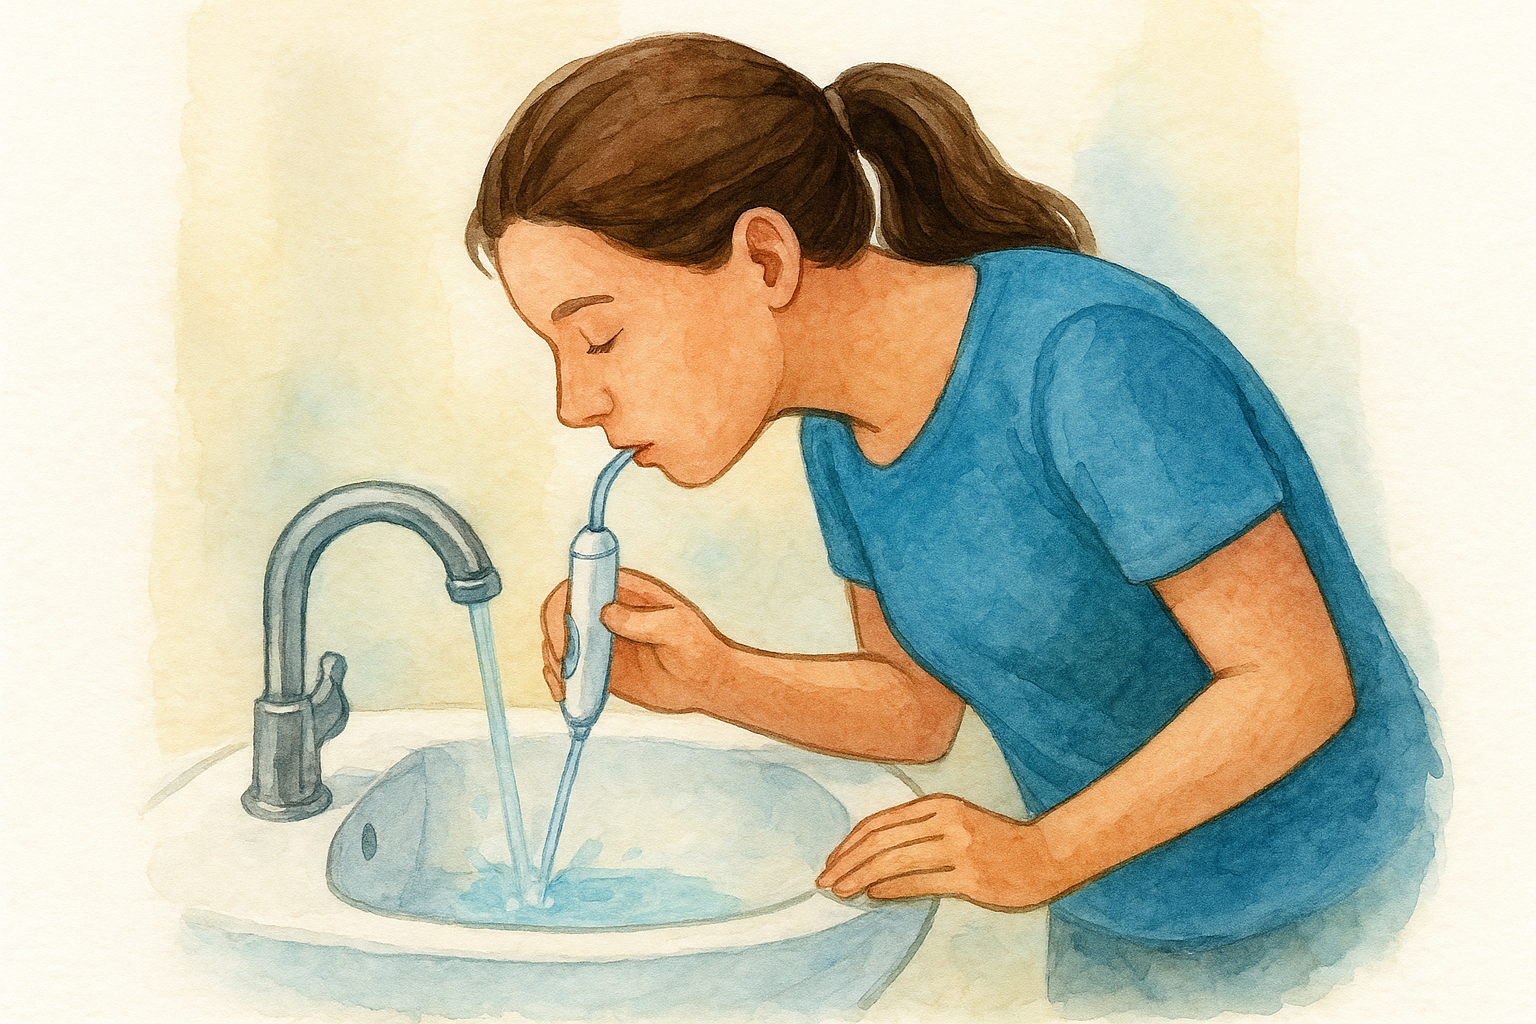
Turning the device on outside your mouth is the single most common cause of water flosser mess.
Start low and increase pressure gradually
Begin on the lowest pressure setting and work up gradually over a few sessions. Starting high on day one often causes gum discomfort and makes the stream harder to control. Use this quick reference to match pressure settings to your situation:
- Low: sensitive gums, first week of use, or recent dental work
- Medium: everyday cleaning for most adults
- High: stubborn debris between back molars, used sparingly
Step 3. Clean outside, inside, and behind teeth
Understanding how to use a water flosser correctly means covering every surface, not just the gaps you can easily see. Work in a consistent three-zone pattern: outer surfaces, inner surfaces, and the back row of molars. Skipping any zone leaves plaque behind in spots your brush already misses.
Follow a consistent zone-by-zone pattern
Hold the tip at a 90-degree angle to your gumline, roughly perpendicular to the tooth surface. Pause for one to two seconds at each gap before moving to the next. Use this sequence every session:
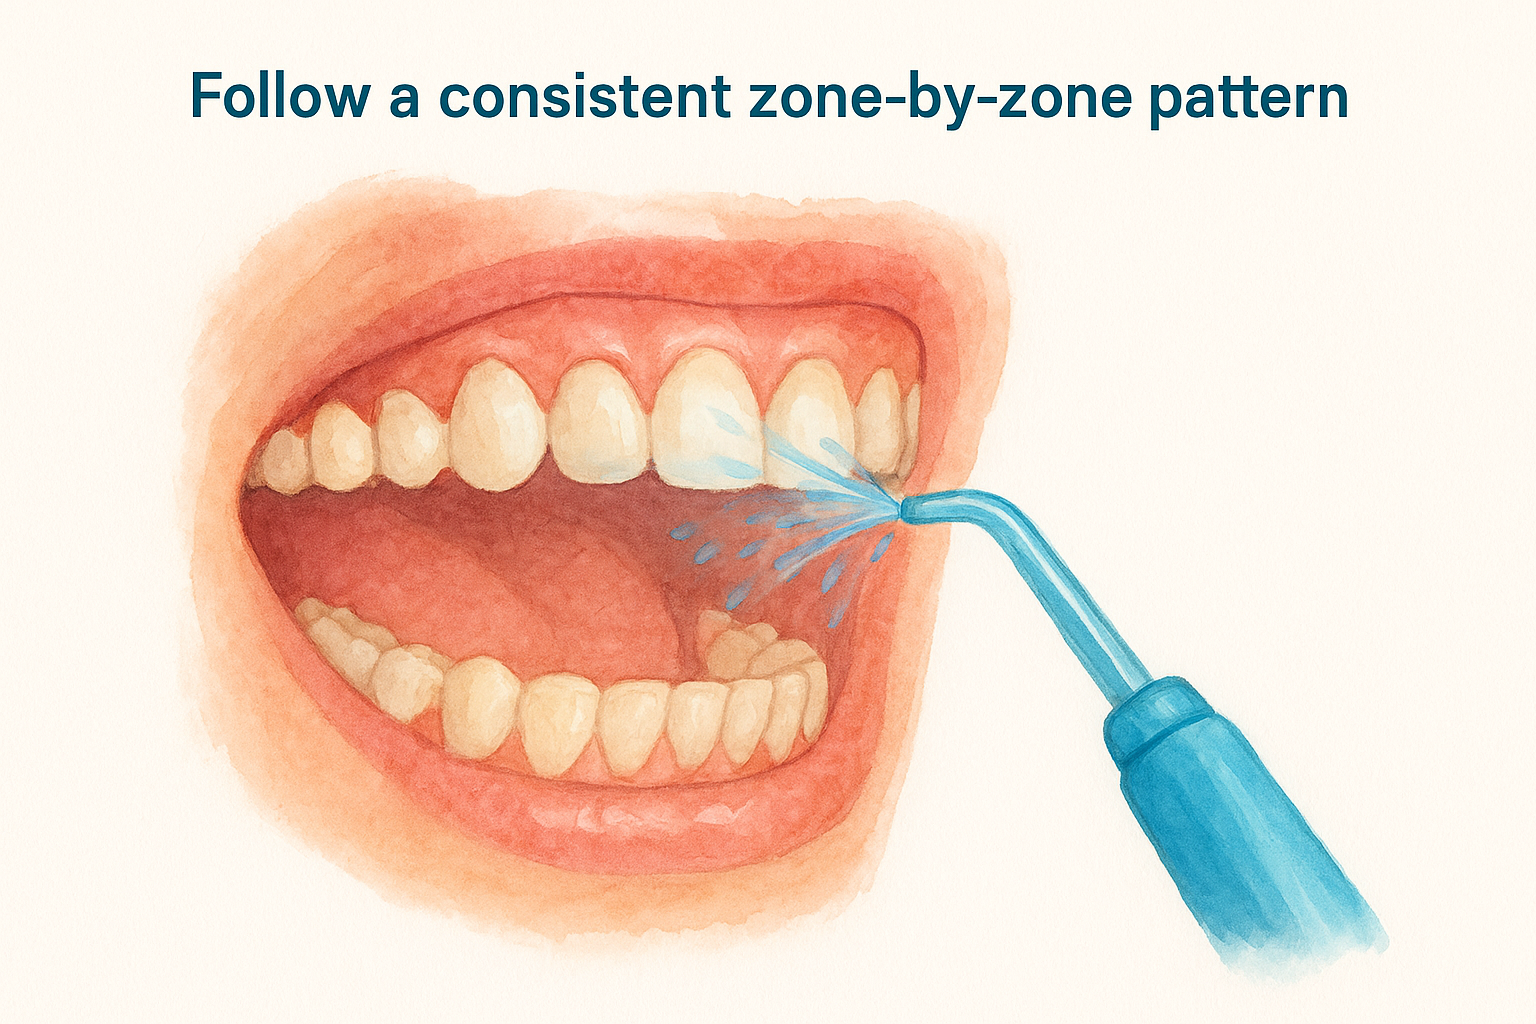
- Outer upper teeth: start at the back molar, move forward along the gumline to the front
- Outer lower teeth: repeat the same left-to-right sweep along the bottom
- Inner upper teeth: flip the tip inward and trace the same path on the tongue side
- Inner lower teeth: mirror the motion on the lower inner surfaces
Pausing at each gap rather than sweeping quickly gives the pulsating stream enough time to flush debris out fully.
Cover the hard-to-reach back teeth
Back molars collect more debris than any other area because your brush rarely reaches their inner edges. Angle the tip slightly toward the back of your mouth and open wider than feels necessary to get direct access.
Step 4. Braces, implants, crowns, and gum pockets
Knowing how to use a water flosser correctly matters even more when you have dental hardware or sensitive gum tissue involved. Standard string floss struggles around brackets and implant posts, but a water flosser navigates those areas with far less friction and risk.
Cleaning around braces and implants
Switch to an orthodontic tip when cleaning around braces, and aim the stream directly at each bracket before tracing along the wire. For implants, keep your pressure setting on low and angle the tip along the implant collar rather than directly into the surrounding tissue. Use this approach by hardware type:
- Braces: orthodontic tip, medium pressure, aim at each bracket and along the wire
- Implants: periodontal tip, low pressure, trace the collar edge
- Crowns: standard tip, medium pressure, trace the margin where crown meets tooth
Targeting gum pockets
Gum pockets need a slow, deliberate pause at each affected site. Hold the tip parallel to the gumline and let the pulsation do the work rather than pressing the tip deeper into the pocket. Trace the full margin around each affected tooth instead of targeting only the most tender spot.
Pressing the tip deeper into a gum pocket adds pressure without improving cleaning and can irritate already sensitive tissue.
Step 5. Aftercare: empty tank, clean, and replace tips
After each session, aftercare takes less than a minute and directly extends the life of your device. Skipping it allows bacteria and mineral deposits to build up inside the reservoir and tip, which defeats the purpose of knowing how to use a water flosser correctly in the first place.
Empty and rinse the reservoir after every use
Never leave standing water in the reservoir between sessions. Stagnant water encourages bacterial growth and mineral buildup that clogs internal tubing over time. After each use, empty any remaining water, run the device briefly on low to flush the line, then leave the reservoir detached to air dry completely.
Clean the tip and know when to replace it
Rinse the tip under warm running water after every session and soak it in white vinegar or hydrogen peroxide for five minutes weekly to dissolve mineral buildup. Replace tips on this schedule:
- Standard jet tip: every 3 months
- Orthodontic tip: every 3 months, or sooner if bristles fray
- Periodontal tip: every 3 months
A worn or clogged tip delivers weaker pulsation, which reduces cleaning effectiveness regardless of your technique.
Key takeaways
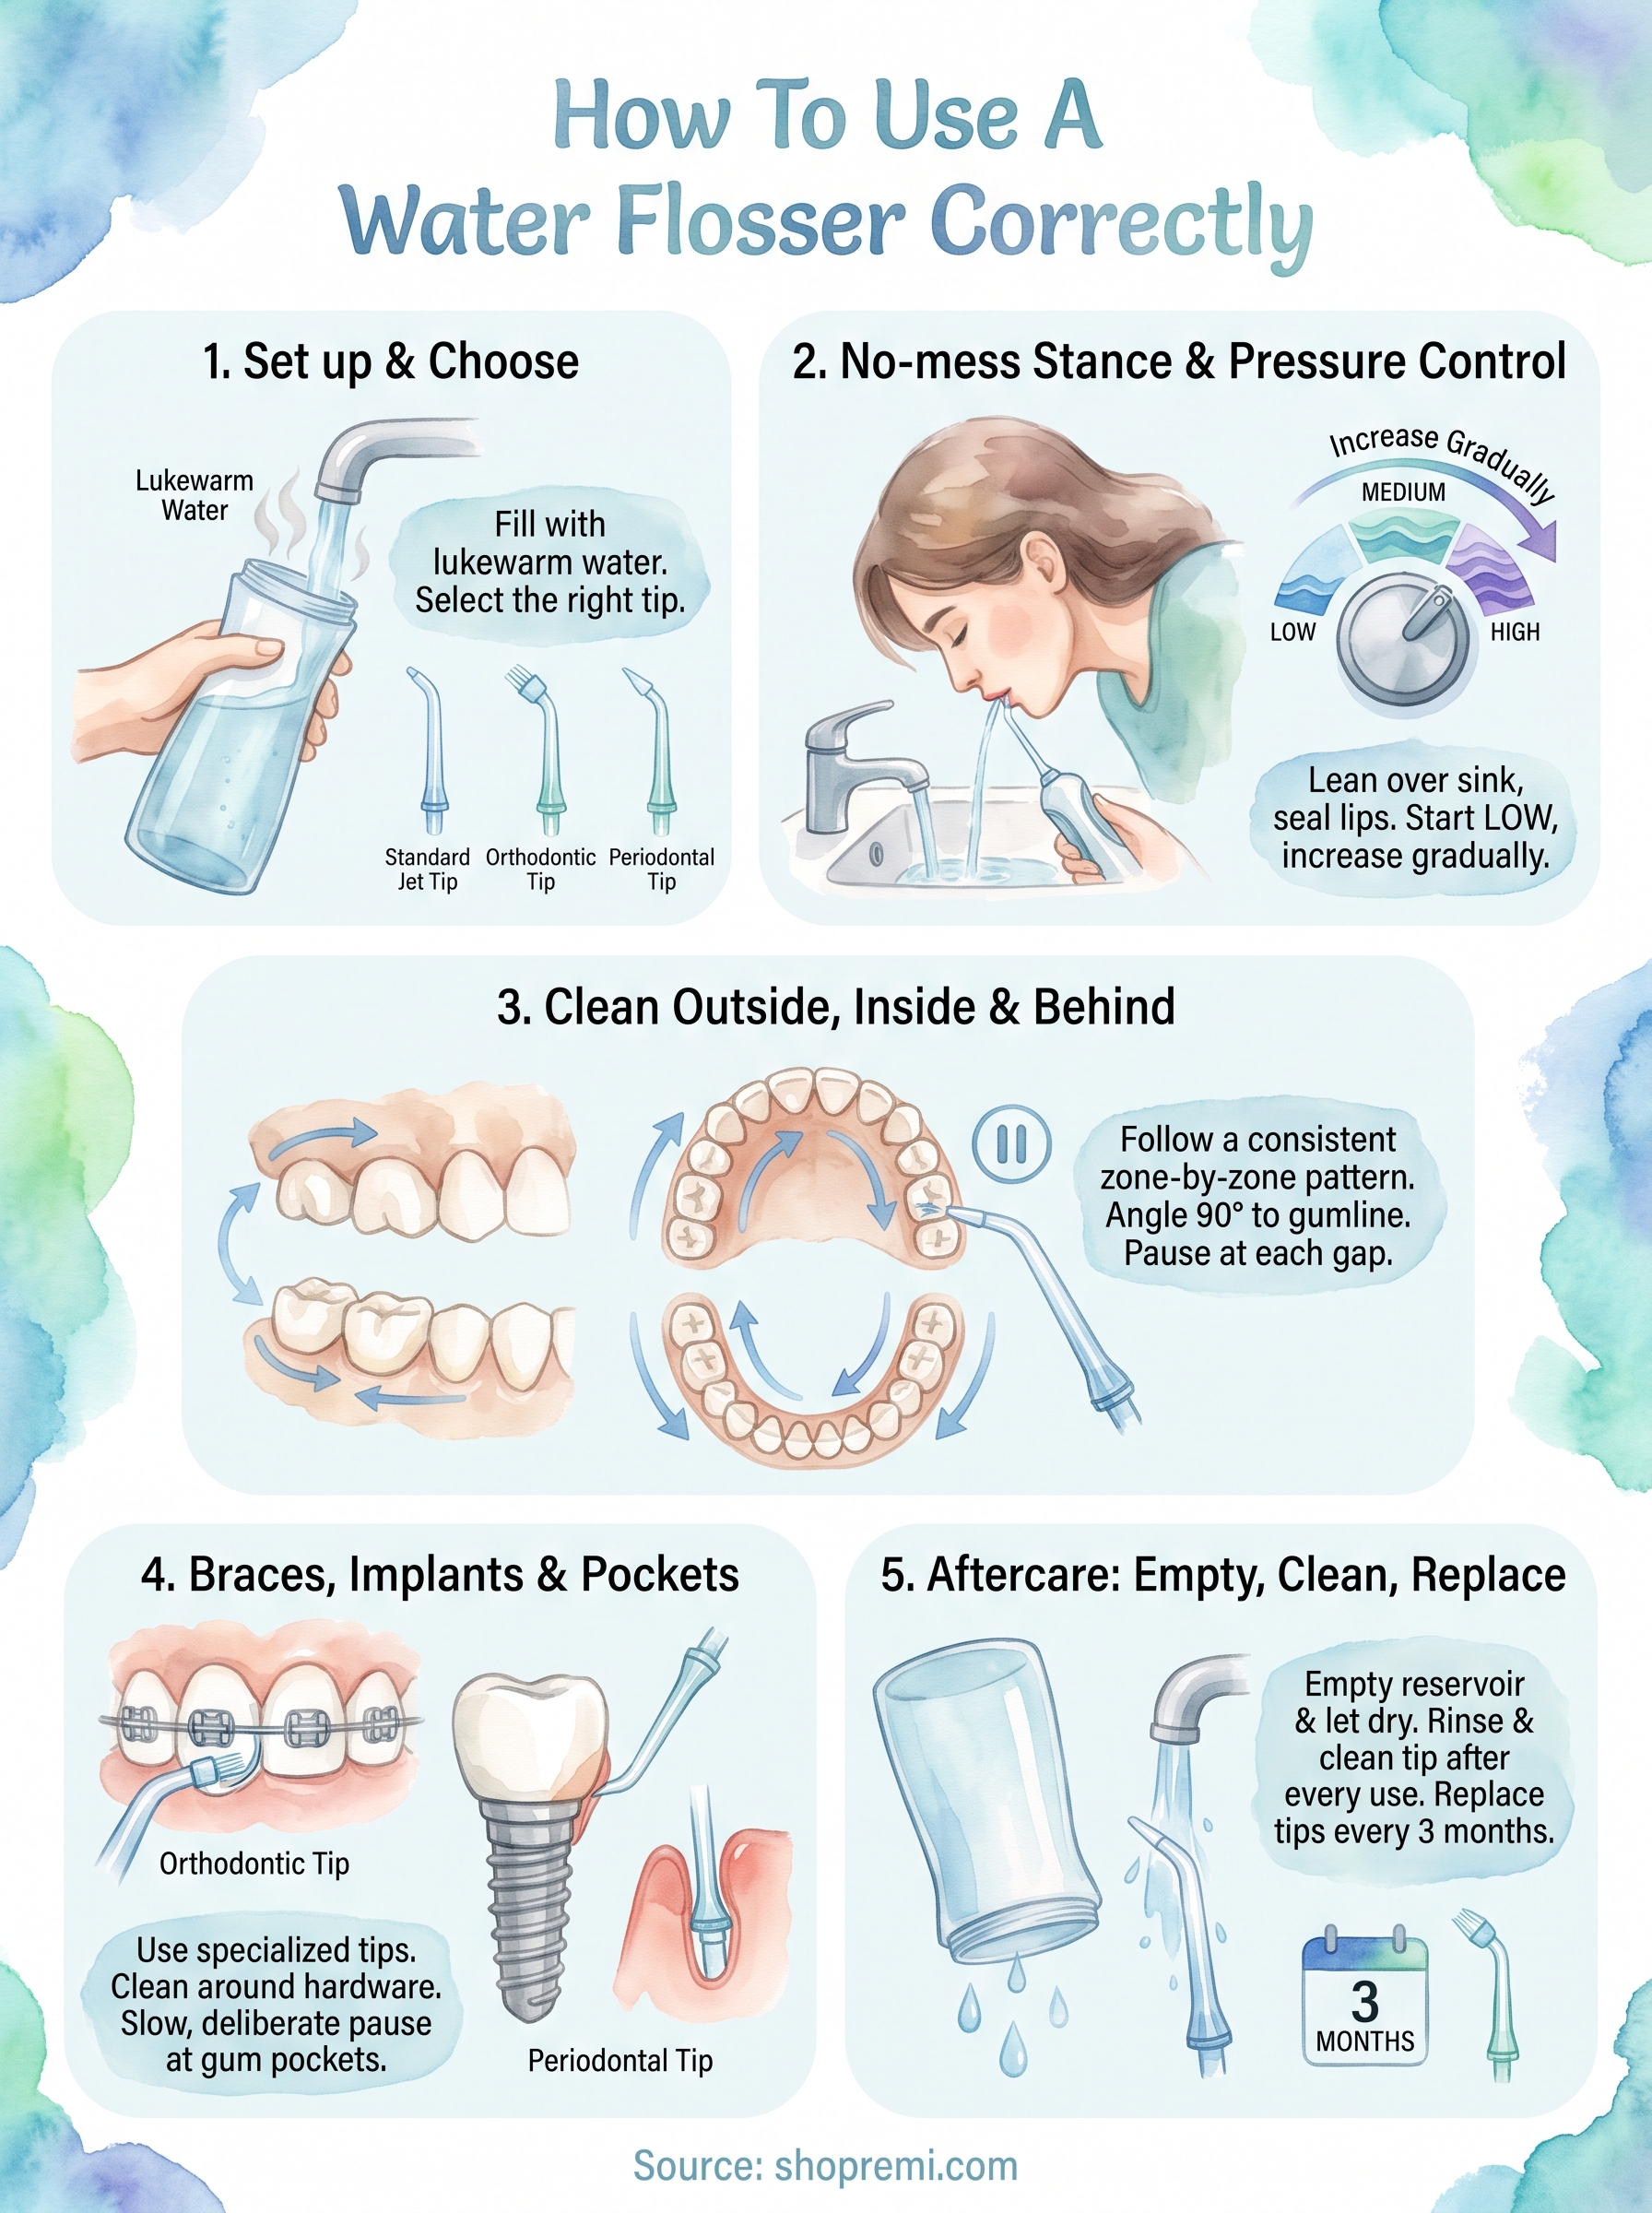
Knowing how to use a water flosser correctly comes down to five repeatable habits: set up with lukewarm water and the right tip, lean over the sink with your lips sealed before powering on, start at low pressure and work up, trace every surface in a consistent zone-by-zone pattern, and empty the reservoir after every session. None of these steps take long, but each one directly affects how well your flosser actually cleans.
Your technique improves quickly with practice. By the end of the first week, controlling the stream and covering every tooth zone becomes second nature. The payoff is real: cleaner gaps, healthier gums, and a more complete daily routine than brushing alone ever delivers. If you are ready to make water flossing a core part of your oral care, the Remi Cordless Water Flosser is rechargeable, portable, and built for exactly this kind of consistent, effective daily use.

