
 Guards + Retainers
 Custom Night Guard
 Retainer
 Emergency Order

 Whitening
 Whitening Kit
 Teeth Whitening Gel
 Dual-Action Foam
 Cleaning + Care
 Ultrasonic Cleaner Pro
 Water Flosser
 UV Toothbrush Sanitizer
 Deep Clean + Freshening Tablets
 Accessories
 Guard Removal Tool
 Replacement Nozzles
 Bundles

Your retainer won't last forever. Whether it's cracked, warped, lost, or just worn out from years of use, putting off a replacement puts your smile at risk, and your teeth can start shifting faster than you'd expect. The good news? You can order a replacement retainer online without booking a dental appointment or paying the $300–$800 price tag that most dental offices charge for a new set.
At-home impression kits have made the whole process surprisingly straightforward. Companies like Remi send everything you need directly to your door, and your custom-fitted retainer arrives within days, all at a fraction of the in-office cost. No waiting rooms. No scheduling headaches. Just a professional-grade retainer made from your exact dental impressions.
This guide walks you through every step, from choosing the right online provider to taking accurate impressions at home and caring for your new retainer once it arrives. If you've been putting this off because it felt complicated or expensive, you'll see how simple it actually is, and why thousands of people are skipping the dentist's office for their replacement retainers.
Before you order: safety and timing
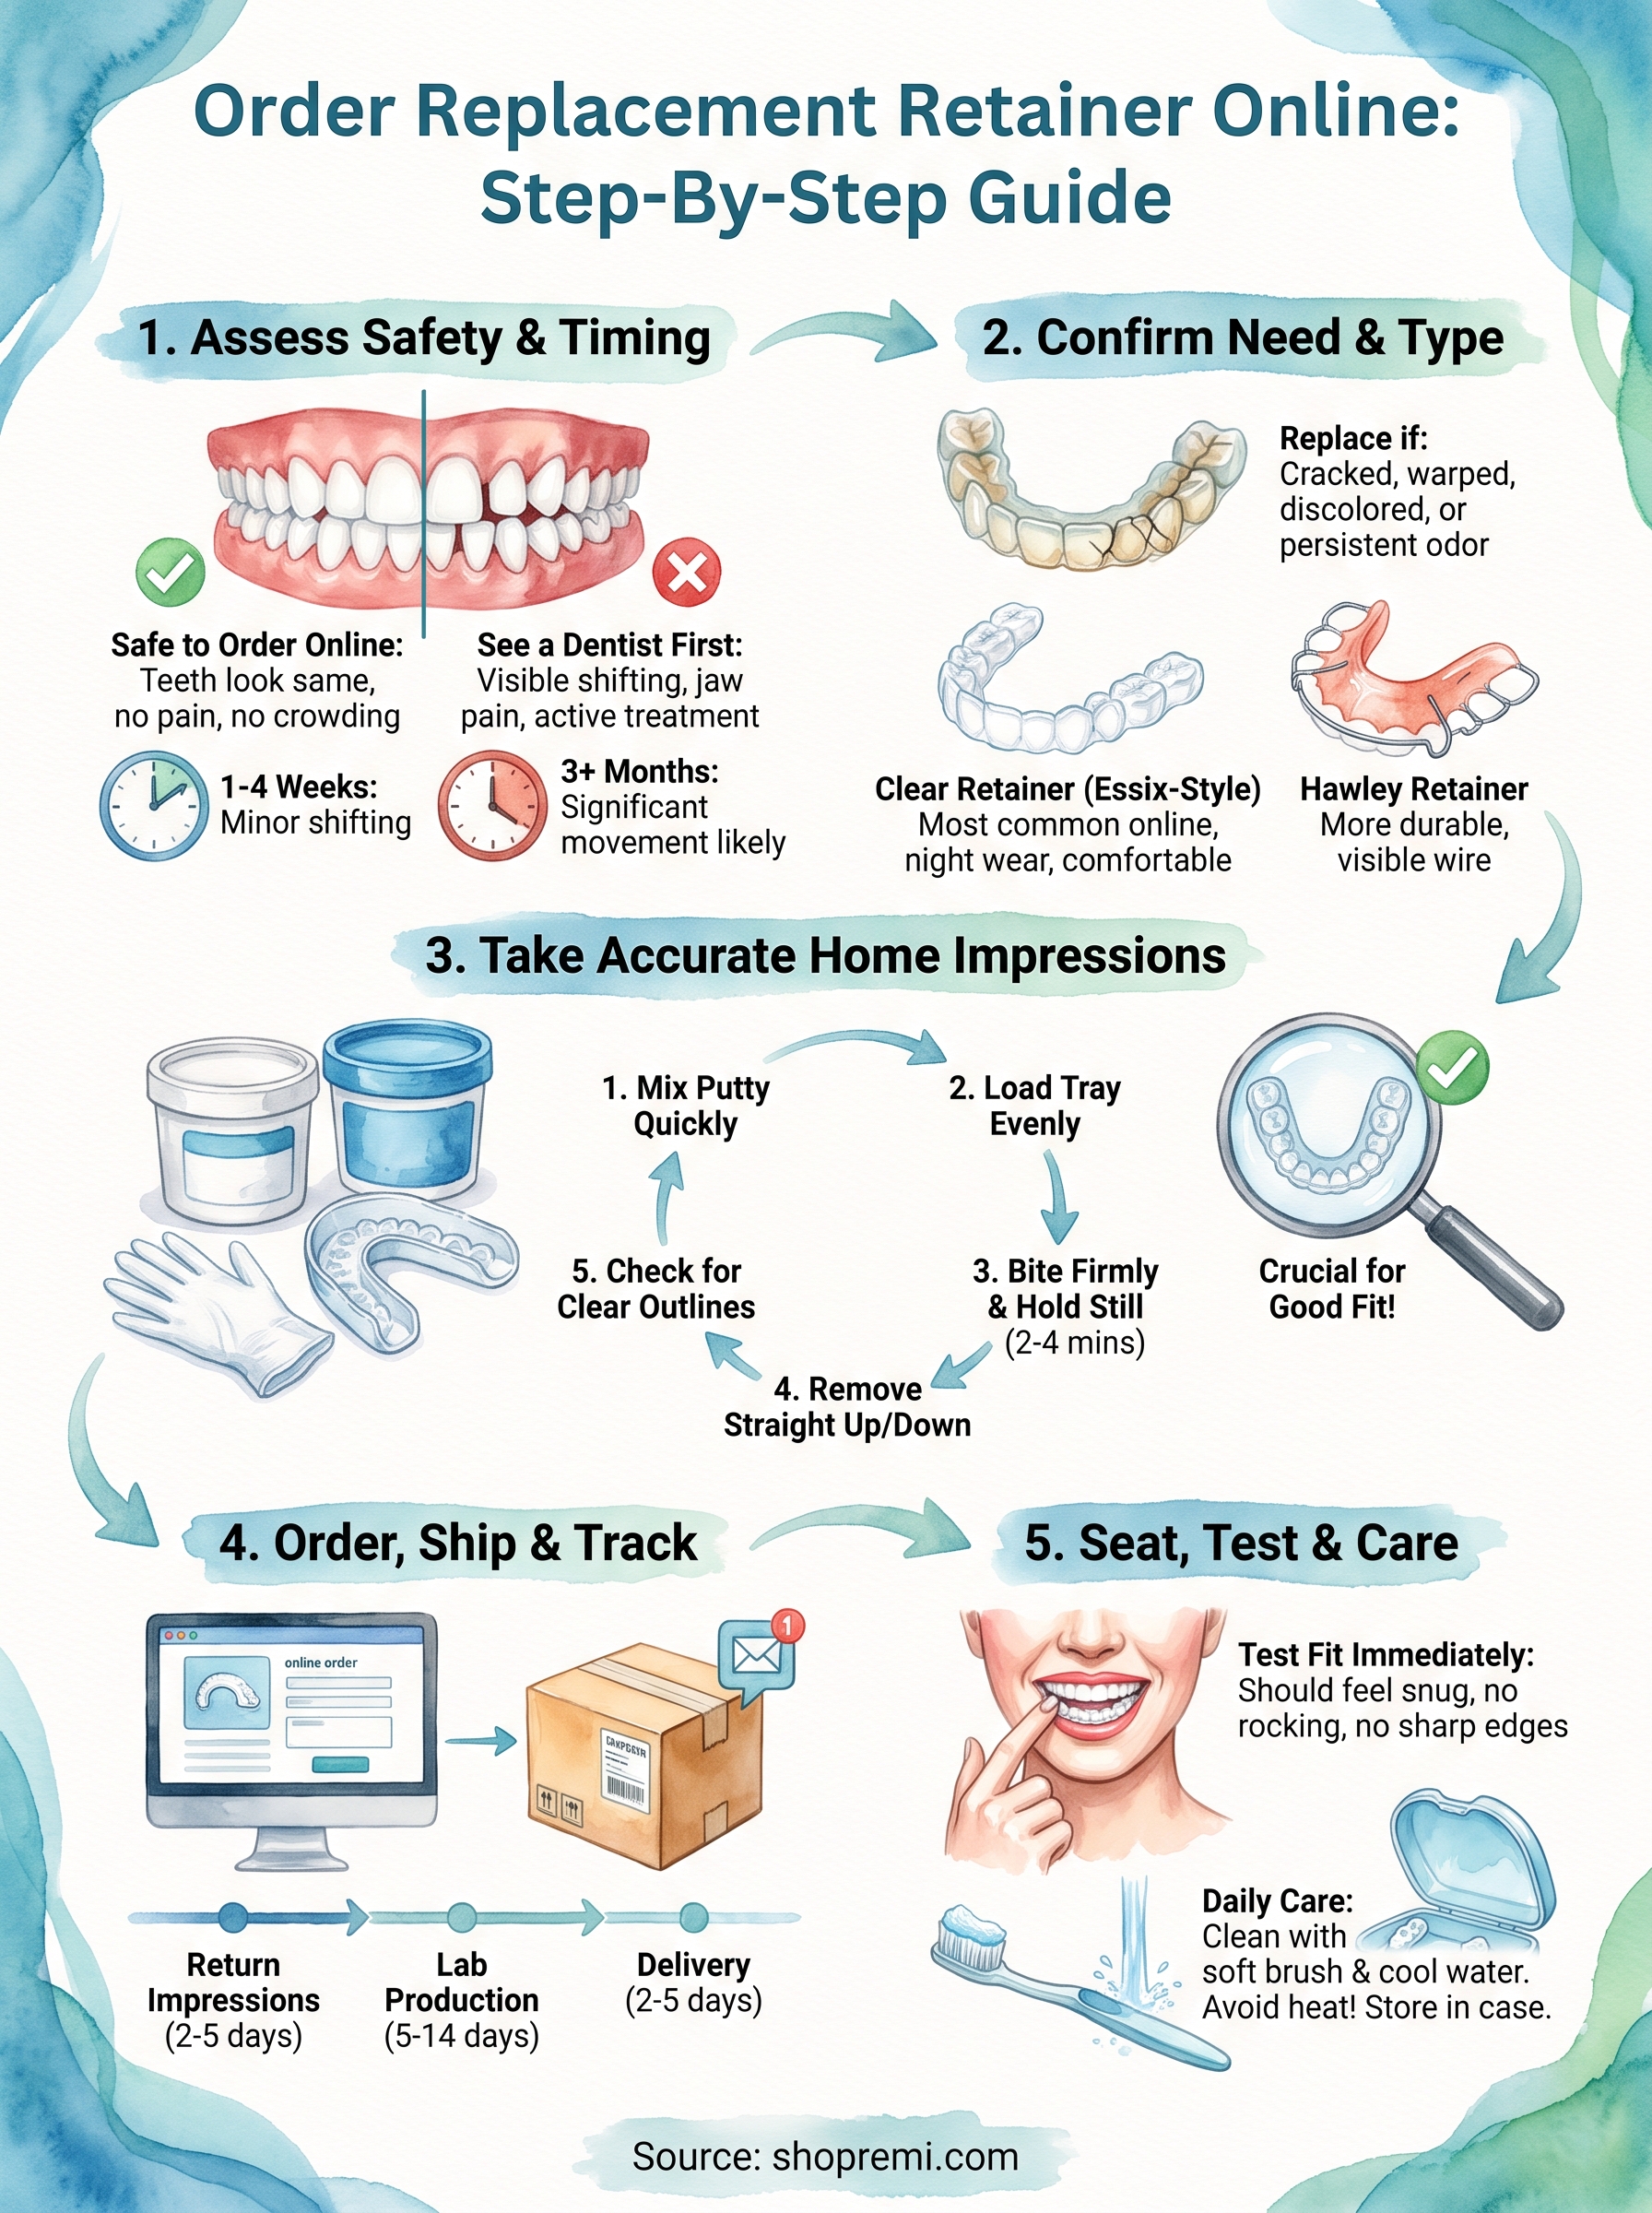
Most people can order a replacement retainer online safely and get excellent results, but skipping a quick self-assessment before checkout is a mistake worth avoiding. Two factors matter most here: whether your teeth have moved enough to need professional correction first, and how much time has passed since you stopped wearing your retainer consistently. Getting clear on both before you place your order means your new retainer will fit accurately and actually protect your alignment.
When an online retainer is the right choice
Online retainers work best when your teeth are still in roughly the same position as when you last wore your retainer regularly. If you stopped wearing it recently or only missed a short stretch, an at-home impression kit will capture your current alignment well, and your replacement will fit the way it should. However, if your teeth have shifted noticeably, a retainer made from fresh impressions will hold them in that drifted position, not move them back to where they were. That distinction matters a lot.
If your teeth have drifted and you want them corrected, you need orthodontic treatment first, not just a new retainer.
Use this checklist to decide if ordering online is appropriate for your situation:
- Your retainer broke, warped, lost, or became too worn to wear
- Your teeth look and feel the same as they did during regular retainer use
- You have no jaw pain, tooth pain, or unexplained swelling
- You are not currently in active orthodontic treatment with a provider
- You have not noticed crowding or spacing that was not present before
If you check all five, you are a strong candidate for the at-home route. If one or more give you pause, a brief check-in with a dentist will tell you whether a direct online order makes sense or whether you need a professional fitting first.
How fast teeth shift without a retainer
Teeth can begin shifting within days of stopping retainer wear, though the speed varies by person and by how recently you finished orthodontic treatment. During the first year after braces or aligners, teeth are especially prone to moving because the surrounding bone and ligaments have not fully stabilized yet. After several years of consistent wear, the risk is lower but never zero.
This table gives you a practical reference for timing:
| Time without retainer | Likely impact |
|---|---|
| 1 to 7 days | Minimal shifting; retainer may feel slightly tight |
| 1 to 4 weeks | Noticeable tightness; some movement is possible |
| 1 to 3 months | Moderate shifting; retainer may not seat correctly |
| 3+ months | Significant movement likely; professional evaluation recommended |
The sooner you act, the more likely an at-home impression kit will capture an accurate fit without any complications. Waiting longer does not make the process harder to complete, but it does increase the chance that your new retainer will lock in a shifted position rather than your ideal alignment.
Step 1. Confirm you need a new retainer
Before you order a replacement retainer online, take two minutes to confirm that a replacement is actually what you need. Some retainers look rough but still function, while others appear intact but have warped enough to cause problems. Identifying the real issue upfront saves you time and ensures your new retainer arrives ready to do its job.
Signs your retainer needs replacing
Your retainer sends clear signals when it has reached the end of its useful life. Physical damage is the most obvious indicator, but wear-related problems can be just as serious even when the appliance looks fine at first glance.
Watch for these specific signs:
- Visible cracks, splits, or holes in the plastic or wire components
- Discoloration that does not clean off after thorough brushing or soaking
- Rough or sharp edges that irritate your gums or cheeks
- A retainer that no longer seats fully against your teeth
- Persistent odor despite regular cleaning, which signals bacterial buildup in degraded material
- Warping or distortion from heat exposure, such as being left in a hot car
If you notice any of these, replacement is the right move, not more cleaning or adjusting.
When you should try wearing it first
Sometimes a retainer that has been sitting unused for a few weeks just needs a short adjustment period. If yours feels tight but seats fully on your teeth without forcing, wear it for a few hours each day and see if it normalizes within a week. Tightness alone does not always mean failure.
A retainer that causes pain, leaves red marks, or simply will not seat properly needs to be replaced, not forced.
Do not try to bend or heat the plastic yourself to improve the fit. DIY adjustments almost always make the fit worse and can crack the material entirely. If gentle re-wearing does not help within a week, move on and order a replacement.
Step 2. Choose the right retainer type
Not all retainers serve the same purpose, and picking the wrong type before you order replacement retainer online wastes both time and money. The two main options available through at-home providers are clear plastic retainers and Hawley retainers, and each has a distinct set of strengths depending on your lifestyle and what your orthodontist originally prescribed.
Clear retainers vs. Hawley retainers
Clear retainers, often called Essix-style retainers, are made from a thin, transparent plastic that fits snugly over your teeth. They are nearly invisible, which makes them popular with adults who wear their retainers during the day. The tradeoff is that the plastic wears down faster than a wire appliance, especially if you grind your teeth or drink hot liquids with the retainer in.
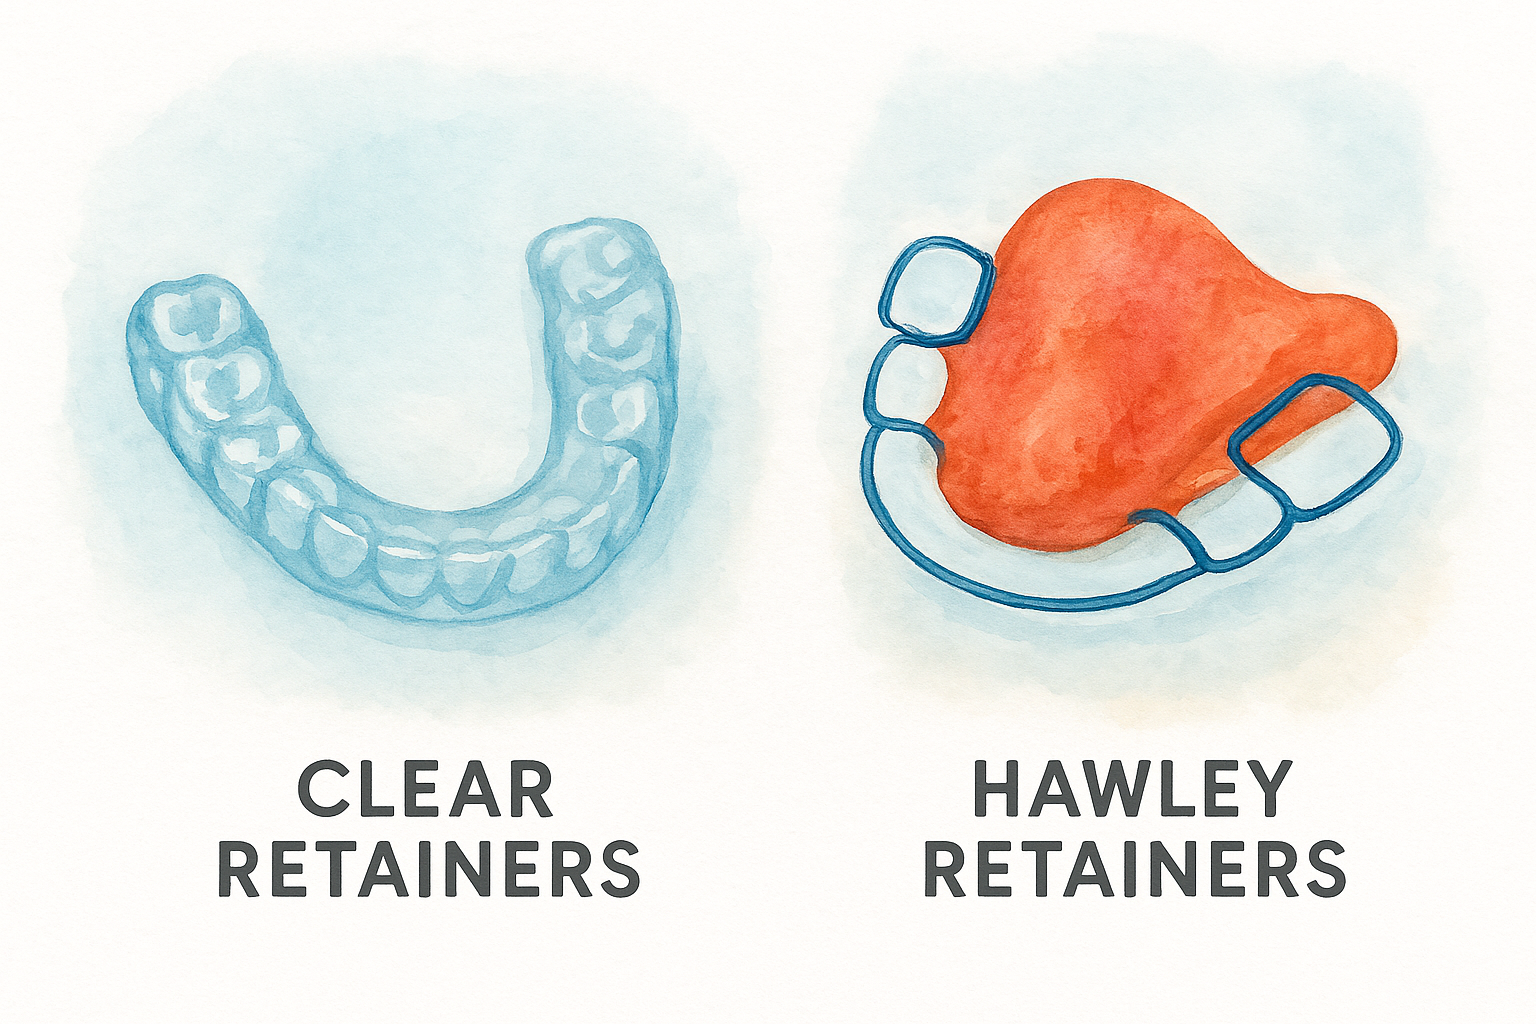
Clear retainers are the most common replacement option ordered online because they are easy to produce from at-home impressions and comfortable to wear overnight.
Hawley retainers use an acrylic base with a metal wire that runs across the front of your teeth. They are more durable than clear plastic and allow minor adjustments if the fit feels off over time. The wire is visible when you smile, which is the main reason some people prefer the clear alternative. However, if your original provider prescribed a Hawley retainer specifically for your bite, switching to a clear version without professional guidance is not recommended.
| Feature | Clear retainer | Hawley retainer |
|---|---|---|
| Visibility | Nearly invisible | Wire is visible |
| Durability | Moderate | Higher |
| Ease of online ordering | Very common | Less common |
| Best for | Night wear, aesthetics | Long-term durability |
Which type works for your situation
Check your original orthodontic records or paperwork to confirm what type you were prescribed. If you no longer have those records, contact your orthodontist's office and ask for your treatment notes. Most people who finished braces or aligners within the last ten years were fitted with a clear Essix-style retainer, which is the most straightforward to replace through an at-home provider.
Step 3. Take accurate impressions at home
The impression process is where everything comes together. When you order replacement retainer online, the accuracy of your at-home impressions directly determines how well your finished retainer fits. A rushed or incorrect impression leads to a retainer that sits poorly, which means redoing the process or, worse, wearing something that gradually locks in the wrong alignment.
Prepare before you open the kit
Read the full instructions before touching any materials. Most kits include putty or trays with a limited working time once activated, so knowing each step in advance prevents costly mistakes. Clear a clean surface, set out all components, and wash your hands thoroughly before you begin. Some kits also recommend brushing your teeth beforehand to remove debris that can interfere with the impression surface.
A dry mouth produces cleaner impressions, so avoid eating or drinking for at least 30 minutes before you start.
Take the impression correctly
Bite down firmly and evenly into the putty-filled tray, making sure all your teeth press fully into the material. Hold the tray completely still for the full time listed in the instructions, typically between 2 and 4 minutes. Shifting, chewing, or tilting the tray while the material sets creates distortions that affect the finished retainer.

Follow this checklist step by step:
- Mix or activate the putty exactly as the kit instructions describe
- Load the tray evenly so every section has equal material
- Center the tray over your teeth before biting down
- Press firmly and hold completely still for the required time
- Remove the tray in one smooth motion, straight down or straight up
- Check the impression for clear, complete tooth outlines before packaging
Package and send correctly
Allow the impression to firm up fully before placing it in the return packaging, since soft material deforms under pressure during shipping. Most kits include a rigid protective case for exactly this reason. Confirm the return shipping label is attached securely, because a lost package means requesting a new kit and starting over entirely.
Step 4. Order, ship, and track the process
Once your impressions are packaged and ready, the rest of the process moves quickly. When you order replacement retainer online, knowing exactly what to do at checkout and what happens after you drop the package in the mail removes uncertainty and helps you follow through without delays.
Place your order correctly
Visit the provider's website and select your retainer type before you do anything else. Most online providers, including Remi, ask you to choose your retainer style, confirm how many arches you need (upper, lower, or both), and submit payment at checkout. Double-check your shipping address at this step, since an error here means a significant delay once your custom appliance ships back to you.
After you complete your purchase, you will receive a confirmation email with instructions for returning your impressions. Most providers include a prepaid return shipping label inside the kit, so attach it to the return box and drop it off at the carrier's specified location. Do not leave the package in a standard mailbox if the instructions say otherwise.
Keep your return tracking number in a safe place so you can confirm the lab receives your impressions without issues.
What to expect during production and delivery
Production typically takes between 5 and 14 business days from the moment the lab receives your impressions, depending on the provider and the retainer type you ordered. Clear retainers generally move through production faster than Hawley-style appliances. Some providers send an email notification when your impressions arrive and again when your finished retainer ships.
Use this reference to set realistic expectations:
| Stage | Typical timeline |
|---|---|
| Return shipping (impressions to lab) | 2 to 5 business days |
| Lab production | 5 to 14 business days |
| Delivery of finished retainer | 2 to 5 business days |
Check your spam folder if you do not receive shipping updates within the expected window, since order confirmation emails occasionally get filtered. If production exceeds the stated timeframe, contact customer support directly with your order number to get a status update.
Step 5. Get a good fit and prevent future mishaps
Your retainer arrives in a protective case with basic care instructions, but what you do in the first 48 hours sets the tone for how well it fits and how long it lasts. Testing the fit correctly when it lands and building a few simple habits into your routine means you will not find yourself needing to order replacement retainer online again sooner than expected.
Seat and test the fit on arrival
Open the package and try the retainer immediately rather than setting it aside for later. Press it firmly onto your teeth using your fingers, then bite down gently to seat it fully. A well-made custom retainer should fit snugly without requiring force, and it should cover your teeth evenly without rocking or lifting at any point.
If the retainer feels significantly tighter than expected, wear it for short sessions of one to two hours per day for the first few days rather than forcing extended wear right away.
Run through this checklist to confirm the fit is correct before committing to regular wear:
- The retainer seats fully against all teeth without gaps
- No sharp edges press into your gums or cheeks
- The retainer stays in place without biting pressure holding it there
- You feel even, light pressure across the arch rather than pressure on a single tooth
Contact customer support immediately if the retainer rocks, fails to seat, or causes localized pain. Most reputable providers offer remakes if the fit falls outside acceptable tolerances, and acting quickly rather than attempting to wear it through the problem protects both your teeth and your investment.
Keep your retainer lasting longer
Clean your retainer every day with a soft-bristle toothbrush and cool water, and rinse it before placing it back in your mouth. Hot water warps the plastic over time, which is the leading cause of early replacement. Store it in its case whenever it is not in your mouth, and keep it away from heat sources like car dashboards and bathroom counters near warm air vents.
Ready to replace your retainer
You now have everything you need to move forward with confidence. From checking whether your teeth have shifted to taking clean impressions and confirming the fit when your retainer arrives, each step in this guide gives you a clear action to take rather than a reason to wait. Skipping any one of them is the fastest route to a poor-fitting appliance or a longer timeline than necessary.
The process of ordering replacement retainer online is straightforward when you follow the steps in order and choose a provider that uses dental-grade materials and offers support if something goes wrong. Remi checks both boxes: custom-fitted, professionally made retainers delivered directly to your door at a price well below what a dental office charges. Your teeth shift quietly and steadily without a retainer in place, so acting now protects the alignment you worked hard to achieve. Order your custom clear retainer from Remi and get started today.

