

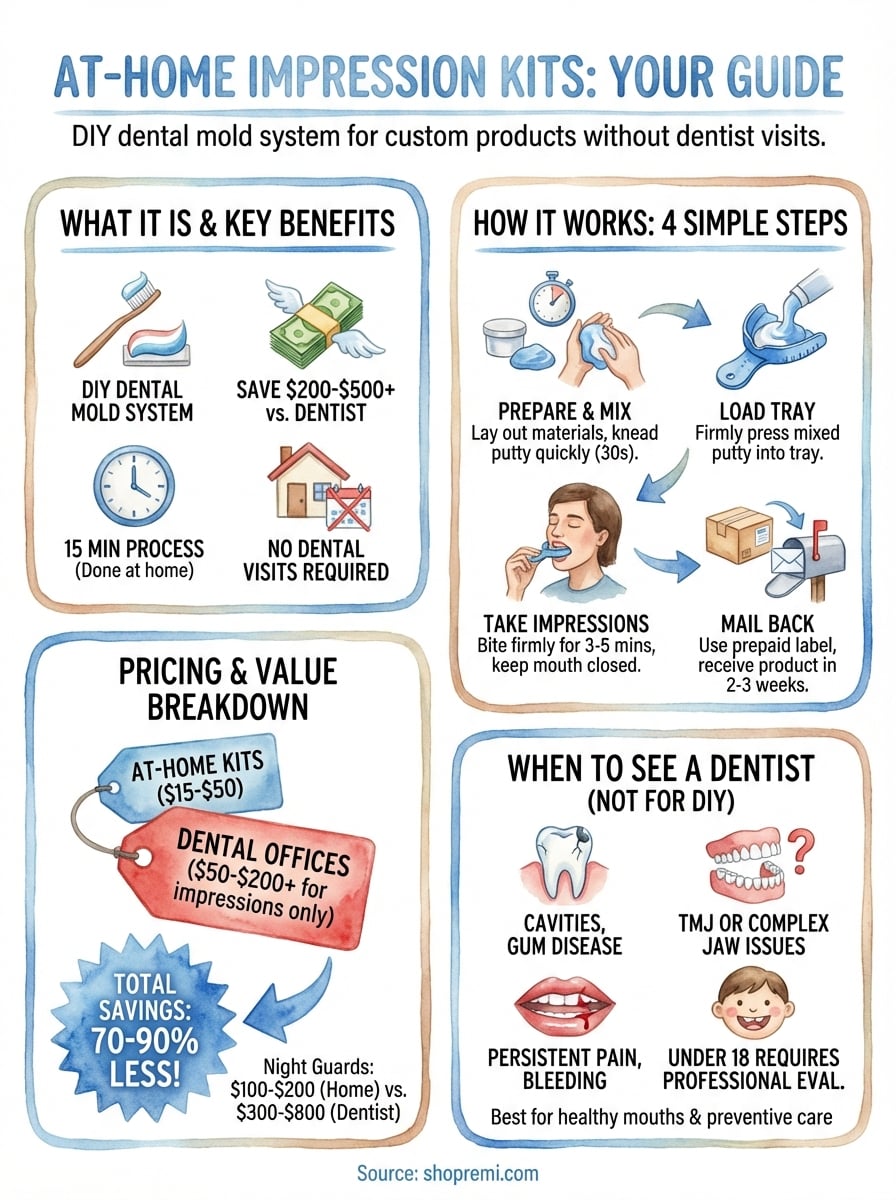
An at home impression kit is a DIY dental mold system that lets you create accurate copies of your teeth without visiting a dentist. The kit includes moldable putty, adjustable trays, and detailed instructions to capture the exact shape of your upper and lower teeth. You complete the entire process at home in about 15 minutes, mail your impressions back using a prepaid shipping label, and receive custom dental products like night guards, retainers, or clear aligners made specifically for your mouth. These kits cost a fraction of what dentists charge for the same products.
This guide walks you through everything you need to know about at home impression kits. You'll learn how they work, what comes inside a typical kit, step-by-step instructions for taking impressions, pricing breakdowns compared to dental office costs, and when you should skip the DIY approach and see a dentist instead. By the end, you'll know whether an at home kit fits your needs and how to use one correctly to get professional results.
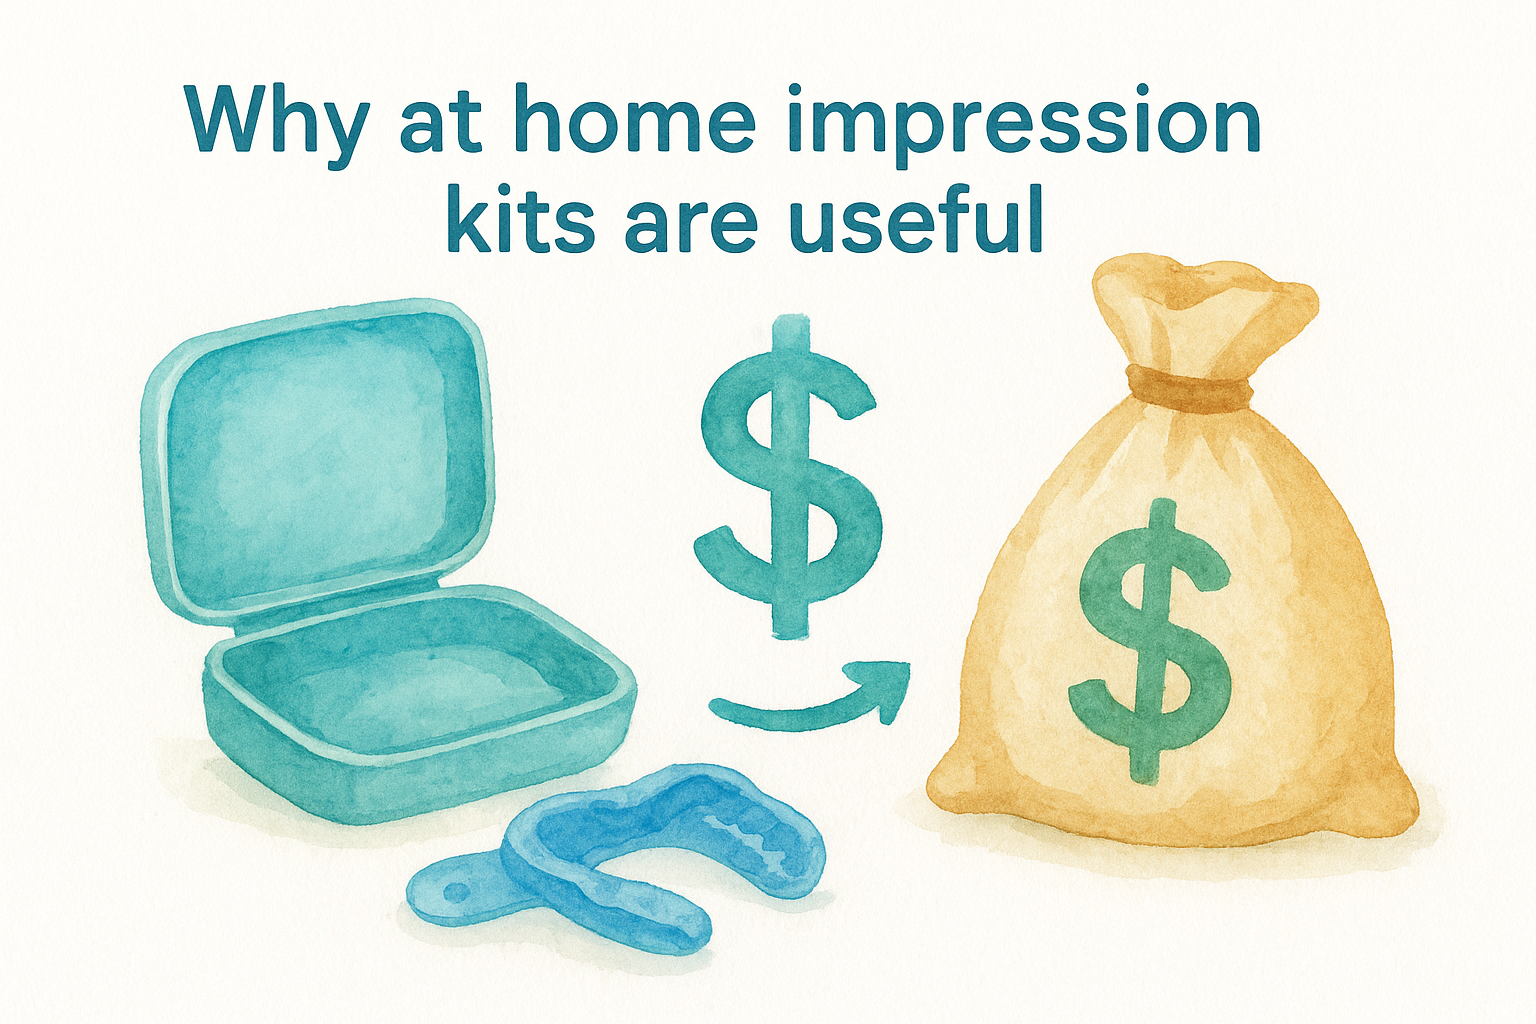
Why at home impression kits are useful
You save significant money and avoid the hassle of dental appointments when you use an at home impression kit. Traditional dentists charge $300 to $800 for custom night guards or retainers, while at home kits deliver identical professional quality for a fraction of that cost.
Key benefits you get
The main advantages include lower costs (typically 50-75% less than dental offices), complete convenience (no appointments or time off work needed), and professional results delivered to your door. You finish the impression process in about 15 minutes on your own schedule.
At home impression kits typically cost 50-75% less than dental office alternatives while delivering identical quality.
The three biggest reasons to choose at home kits:
- Cost savings of $200-$500 per product
- Zero dental office visits required
- Same professional quality you'd get from a dentist
How to use an at home impression kit step by step
You complete the impression process in four straightforward stages that take about 15 minutes total. The kit includes everything you need along with detailed instructions, but following the correct technique ensures you capture accurate molds the first time. Most people succeed on their first attempt when they carefully follow each step without rushing.
Prepare your workspace and materials
Start by laying out all materials on a clean, flat surface like a kitchen counter or bathroom sink. You need access to running water, a timer, and good lighting. Read through the entire instruction pamphlet before you begin mixing any materials, since the putty sets quickly once activated.
Mix and load the impression putty
You knead the two putty components together for exactly 30 seconds until they form a uniform color with no streaks. Work quickly because the material begins hardening after you mix it. Load the mixed putty immediately into your adjustable tray, pressing it firmly to eliminate air pockets that could create gaps in your impression.
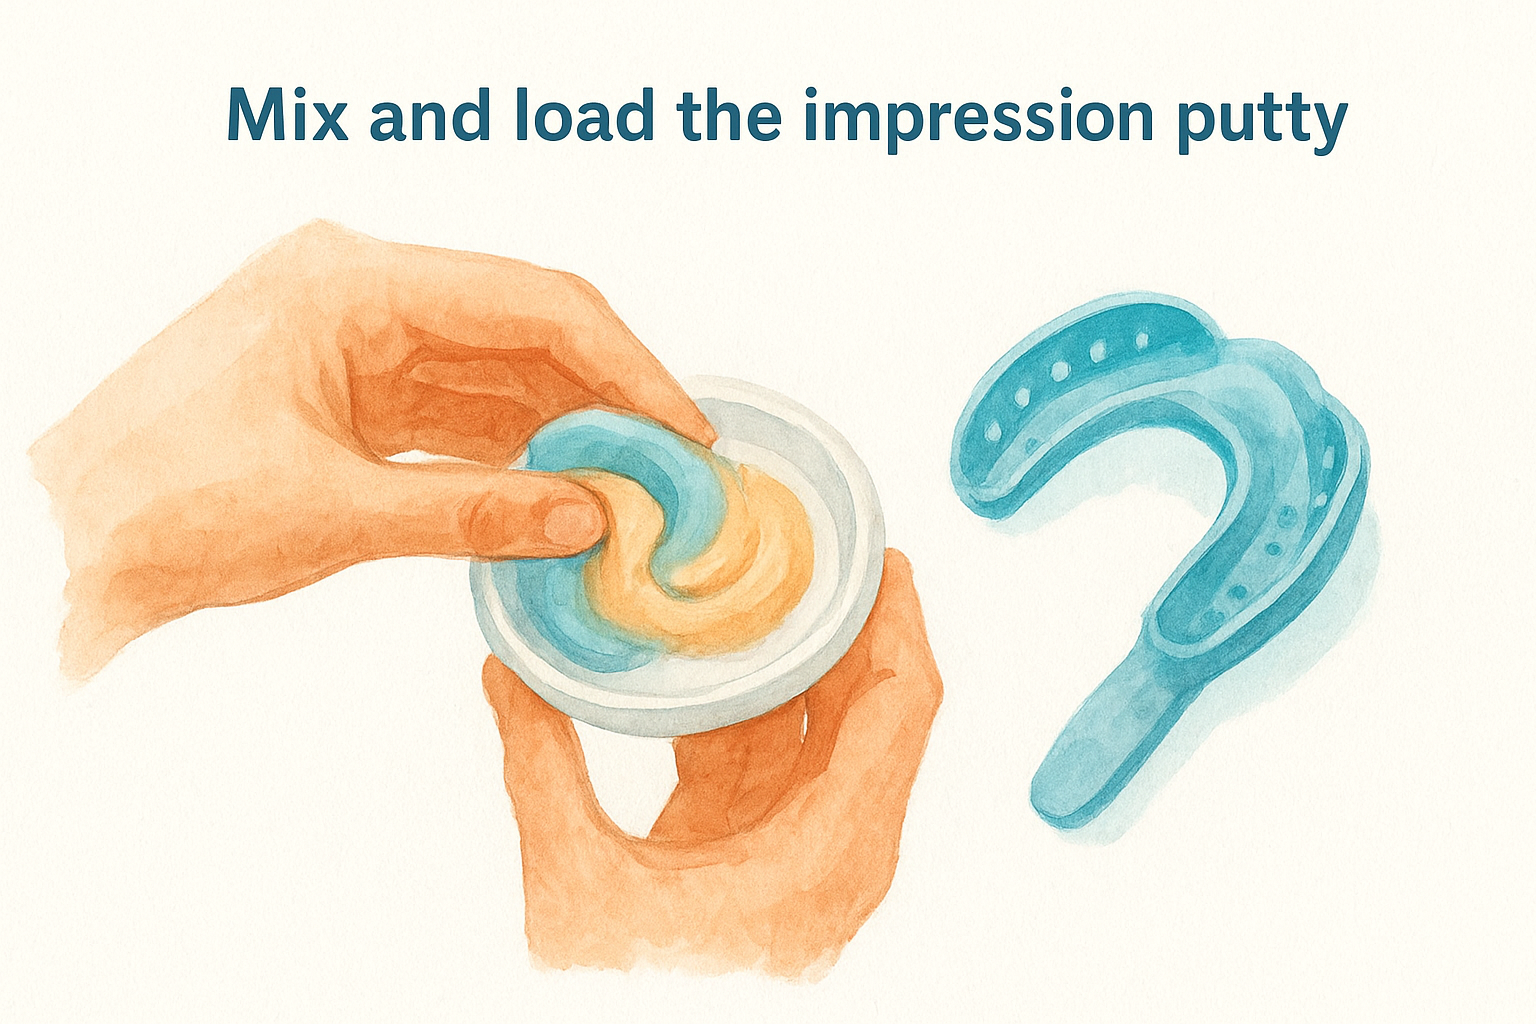
You have approximately 90 seconds to position the loaded tray in your mouth after mixing the putty, so prepare everything beforehand.
Take your upper and lower impressions
Insert the loaded tray into your mouth and bite down firmly for 3 to 5 minutes while the putty sets completely. Keep your mouth closed and breathe through your nose during this time. The material feels slightly warm as it hardens but causes no discomfort. Remove the tray with a gentle rocking motion after the timer goes off, then repeat the entire process for your second arch.
Package and mail your impressions back
Place both completed impressions in the protective case provided along with your completed customer information card. Seal the box using the prepaid shipping label included in your at home impression kit and drop it at any standard mail location. Your custom dental product arrives within 2 to 3 weeks after the lab receives your impressions.
What to expect inside an at home impression kit
Every at home impression kit contains six essential components that work together to create accurate dental impressions. The packaging protects all materials during shipping and doubles as your return container once you complete the molding process. You'll find everything organized and clearly labeled inside the box.
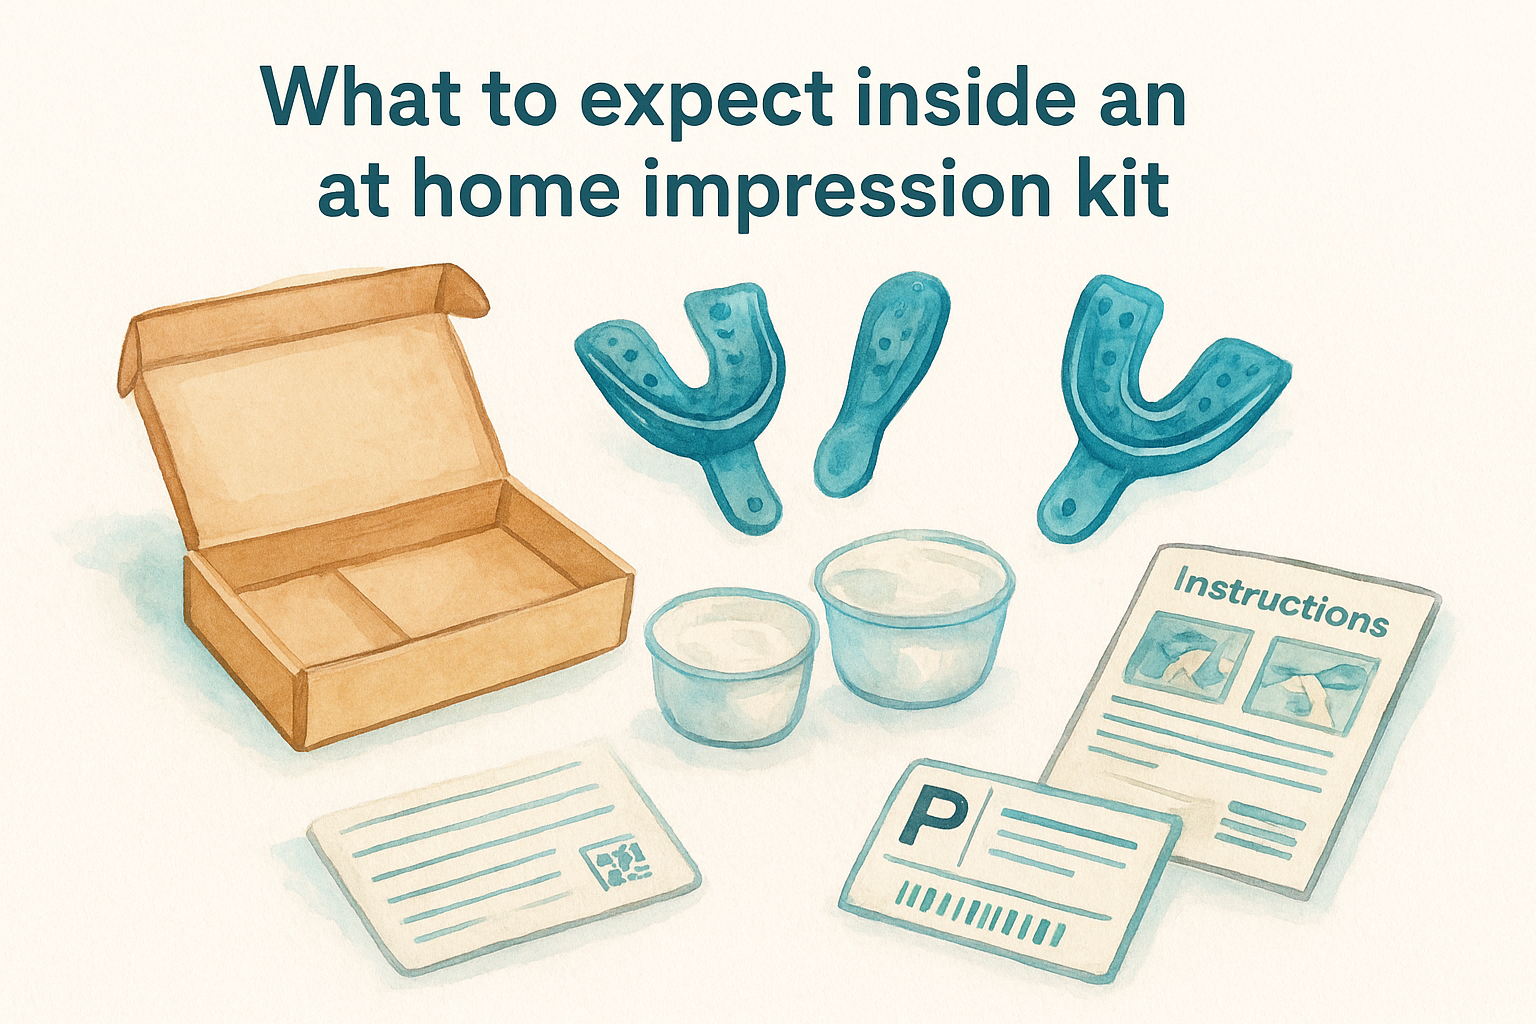
Core impression materials
The adjustable impression trays fit any mouth size through expandable sections or snap-off pieces that customize the fit. Your kit includes dental-grade putty in pre-measured portions for both upper and lower impressions, ensuring you capture every tooth detail without mixing errors.
Professional-grade putty in at home kits meets the same quality standards used by dental laboratories.
Supporting items and documentation
You receive an instruction pamphlet with step-by-step photos and a QR code linking to video tutorials. The customer information card records your preferences and shipping details, while the prepaid return label eliminates any additional costs for mailing your impressions back to the lab.
Understand pricing and value for impression kits
You pay between $15 and $50 for most at home impression kits, though pricing varies based on what dental product you order. The kit itself usually costs less than the final product because companies build the impression kit expense into your total treatment cost. Some providers charge separately for kits while others include them free with your first order.
What you pay for an at home impression kit
Most companies charge $15 to $25 for a standalone impression kit that you can purchase separately. This fee covers the adjustable trays, professional-grade putty, instruction materials, and prepaid return shipping. You might pay up to $50 for kits that include extra impression attempts or premium materials, though the standard version works perfectly for most people.
How kit pricing compares to dental office costs
Dental offices charge $50 to $200 just to take impressions during your appointment, and that's before the cost of your actual dental product. An at home impression kit eliminates this fee entirely while delivering identical accuracy when you follow instructions correctly.
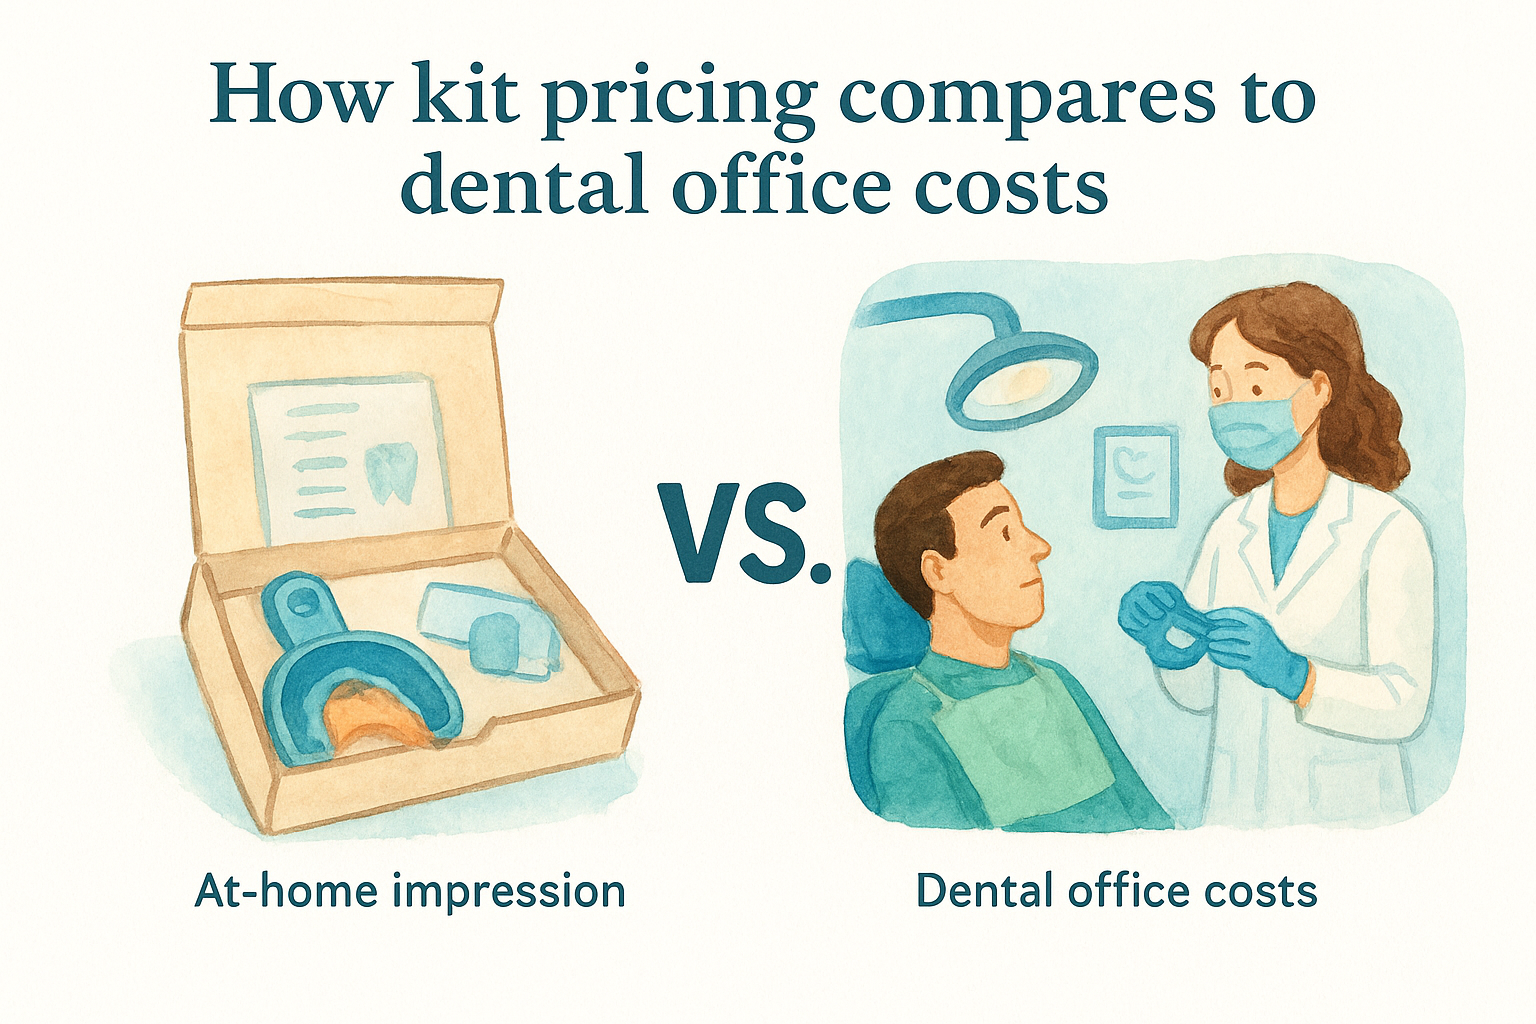
At home impression kits cost 70-90% less than dental office impression appointments while producing the same professional quality.
The total savings multiply when you consider the complete treatment cost. Custom night guards from dentists run $300 to $800, while at home options cost $100 to $200 with the impression kit included. You save hundreds of dollars without sacrificing quality or fit.
Know the limits, risks, and when to see a dentist
At home impression kits work well for straightforward cases but have clear limitations you need to understand before ordering. These kits suit people with healthy teeth and gums who need replacement retainers, basic night guards, or minor alignment corrections. You should not use them if you have active dental disease, severe misalignment, or complex jaw problems that require professional diagnosis and treatment planning.
When DIY impressions aren't appropriate
You need to see a dentist instead of using an at home impression kit if you have cavities, gum disease, or loose teeth. These conditions require treatment before you create any dental appliances. Skip the DIY approach if you need orthodontic work beyond simple retainers, have TMJ disorders requiring medical supervision, or experience unexplained jaw pain. Children under 18 should always get professional evaluation before using any dental products.
At home impression kits work best for maintenance and prevention in healthy mouths, not for treating existing dental problems.
Signs you need professional dental care
Several warning signs mean you should schedule a dental appointment immediately. Contact your dentist if you experience persistent tooth pain, bleeding gums that don't stop after a few days, or sudden changes in your bite alignment. You also need professional care if your impression attempts repeatedly fail, you notice swelling or infection in your mouth, or you have difficulty breathing or swallowing while using dental products.
The biggest risk with at home impression kits comes from delaying necessary treatment by trying to solve dental problems yourself. You can safely use these kits for preventive products like night guards or replacement retainers, but anything involving pain, disease, or structural issues requires professional diagnosis and care.
Next steps
You now understand how at home impression kits work, what they cost, and whether they fit your dental needs. These kits provide affordable access to custom dental products that typically cost hundreds more at traditional dental offices. The process takes 15 minutes of your time and eliminates the hassle of multiple appointments.
Start by choosing the right product for your needs. If you grind your teeth at night, Remi's custom night guard delivers professional protection at 80% less than dentist prices. You receive a complete at home impression kit with your order, along with step-by-step instructions that guide you through creating accurate molds. Your custom-fitted dental product arrives within 2 to 3 weeks, backed by dental professionals who review every impression before manufacturing begins.

